20. Project Workspace Instructions
Running and submitting the Behavioral Cloning Project in workspaces
Behavioral Cloning project workspace
This workspace is designed to be a simple, easy to use environment in which you can code and run the Behavioral Cloning project. The project repo is already included so there is no need of downloading the project repo.
For tips on workspaces use, please review the earlier Workspaces lesson.
Accessing and using the workspace
Go to the workspace in the next lesson. You will be asked if you want to use a GPU-enabled workspace.
Click
YES
to run in GPU-enabled mode
only
if you:
- Want to collect training data.
- Want to test your solution.
- Want to train your neural network using GPU (network training will be challenging without using a GPU).
Click NO to run in GPU-enabled mode only if you:
- Want to code your solution on the text editor.
Simulator
To run the simulator click on the button ** Simulator ** on the bottom right, then go to the newly opened tab in your browser and double-click on the simulator icon in the desktop. This will open the simulator's configuration window, finally, run and test your code or gather data.
Note: If you get an error when clicking on the Simulator button, please check that you have enabled the GPU.

Simulator
Project submission when using the workspace
To submit your project, just click the button SUBMIT PROJECT and follow the instructions to submit!
Make sure that the following files are present in the workspace and follow the naming conventions below to make it easy for reviewers to find the right files:
-
model.py- The script used to create and train the model. -
drive.py- The script to drive the car. You can feel free to resubmit the originaldrive.pyor make modifications and submit your modified version. -
model.h5- The saved model. Here is the documentation explaining how to create this file. -
writeup_reportas a markdown or pdf file. It should explain the structure of your network and training approach. The write-up must also include examples of images from the dataset in the discussion of the characteristics of the dataset. While we recommend using English for good practice, writing in any language is acceptable (reviewers will translate). There is no minimum word count so long as there are complete descriptions of the problems and the strategies. See the rubric and the writeup_template.md for more details about the expectations. -
video.mp4- A video recording of your vehicle driving autonomously at least one lap around the track.
**IMPORTANT: ** Make sure that your directory
/home/workspace/
doesn't include your training images since the Reviews system is limited to 10,000 files and 500MB. If you have more than that you will get the following error
too many files
when trying to submit. To fix this error just move your images to directory below
~/opt/
.
Things to keep in mind
-
If you leave your workspace unattended, it will time out and need to be refreshed. Your most recent work will be restored, but the list of open files or any running shell sessions will not be restored. Also, the data collected by you will not be stored, and you will have to drive the car in the simulator again to collect the data.
-
Try to not save data directly within
/home/workspace/because this directly only have the storage capacity of 3 GB , and storing a large amount of data within this directory, can freeze your workspace. If you need to save a large amount of data use/opt/but all the data saved there will be lost once you leave the classroom.
-
If you want to avoid collecting data every time you refresh workspace, the data can be stored in your local environment (Dropbox, GitHub, Google Drive, etc.) and can be pulled over to the workspace, using the command
'wget'command.
Common Issues
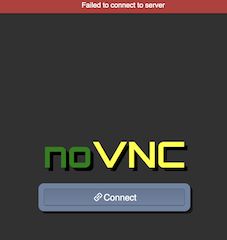
- " No VNC " or " Service is not running " error when launching simulator - this is related to either A) not having the workspace GPU enabled (the simulator needs a GPU to run), or B) the web browser being used. Safari is likely to produce this error, while Chrome should run the simulator fine.
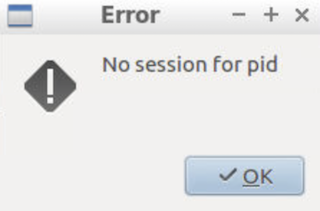
- " No session for PID " error when launching simulator - when the desktop simulator is opened, sometimes a "PID error" window will appear. This error does not impact the simulator itself and can be safely ignored or click OK, it is harmless.
- Missing simulator icon - the simulator icon may fail to appear after a short wait within the Linux Desktop. If this is the case, click on the Terminal icon in the Desktop, and the simulator icon will typically appear. Please note that you still will use the actual Terminal within the primary workspace, and not the one in the Desktop.
Commit to GitHub
Students are highly encouraged to commit their project to a GitHub repo. To do this, you must change the upstream of the current repository and add your credentials. We have supplied a bash script to help you do this. Please open up a terminal, navigate to the project repository, and enter:
./set_git.sh
, then follow the prompts. This will set the upstream remote to your own repository and add your email and username to the git configuration. At this time we are not configuring passwords, so you will need to enter your username and password for each push. Since credentials are not persistent, it will be necessary to run this script each time you open, refresh, or reset the workspace.
Running and submitting the Behavioral Cloning Project in your local machine
Project Submission
For this project, a reviewer will be testing the model that you generated on the first test track (the one to the left in the track selection options).
Whether you decide to zip up your submission or submit a GitHub repo, please follow the naming conventions below to make it easy for reviewers to find the right files:
-
model.py- The script used to create and train the model.
-
drive.py- The script to drive the car. You can feel free to submit the original drive.py or make modifications and submit your modified version.
-
model.h5- The saved model. Here is the documentation explaining how to create this file.
-
writeup_reportas a markdown or pdf file. It should explain the structure of your network and training approach. The writeup must also include examples of images from the dataset in the discussion of the characteristics of the dataset. While we recommend using English for good practice, writing in any language is acceptable (reviewers will translate). There is no minimum word count so long as there are complete descriptions of the problems and the strategies. See the rubric and the writeup_template.md for more details about the expectations.
-
video.mp4- A video recording of your vehicle driving autonomously at least one lap around the track.
As a reminder all of the files we provide for this project (rubric, simulator, GitHub repository, track 1 sample data) can be found in the lecture slide titled "Project Resources".
Further Help
-
Use a generator (such as the
fit_generatorfunction provided by Keras). Here is some documentation that will help. -
Paul Heraty, a student in the October cohort, has written a helpful guide for those of you looking for some hints and advice.
-
You can use our sample data for track 1 (see the "Project Resources" lecture for the link)
-
Keep in mind that training images are loaded in BGR colorspace using cv2 while drive.py load images in RGB to predict the steering angles.
Using GitHub and Creating Effective READMEs
If you are unfamiliar with GitHub , Udacity has a brief
GitHub tutorial
to get you started. Udacity also provides a more detailed free
course on git and GitHub
.
To learn about README files and Markdown, Udacity provides a free course on
READMEs
, as well.
GitHub also provides a tutorial about creating Markdown files.
Project Support
If you are stuck or having difficulties with the project, don't lose hope! Ask (and answer!) questions on Knowledge tagged with the project name or in the Behavioral Cloning channel in your Student Hub. We also have a previously recorded project Q&A that you can watch here !